
THE Q & A SERIES
HOW TO DO A FULL TUMMY ADJUSTMENT
A-line skirts are normally quite easy to fit as the shape can be forgiving. This full tummy adjustment tutorial can be applied to any dress pattern with a waist seam or skirt patterns. It was originally created for our Acton dress, as the bodice finishes under the bust and the top of the skirt starts higher than the natural waistline. Due to the shape of the Acton skirt (View A), this can mean the fabric skims over your tummy.
If you have a protruding tummy or find clothing more comfortable with a bit of extra ease in the tummy area, this tutorial is for you.
Step 1
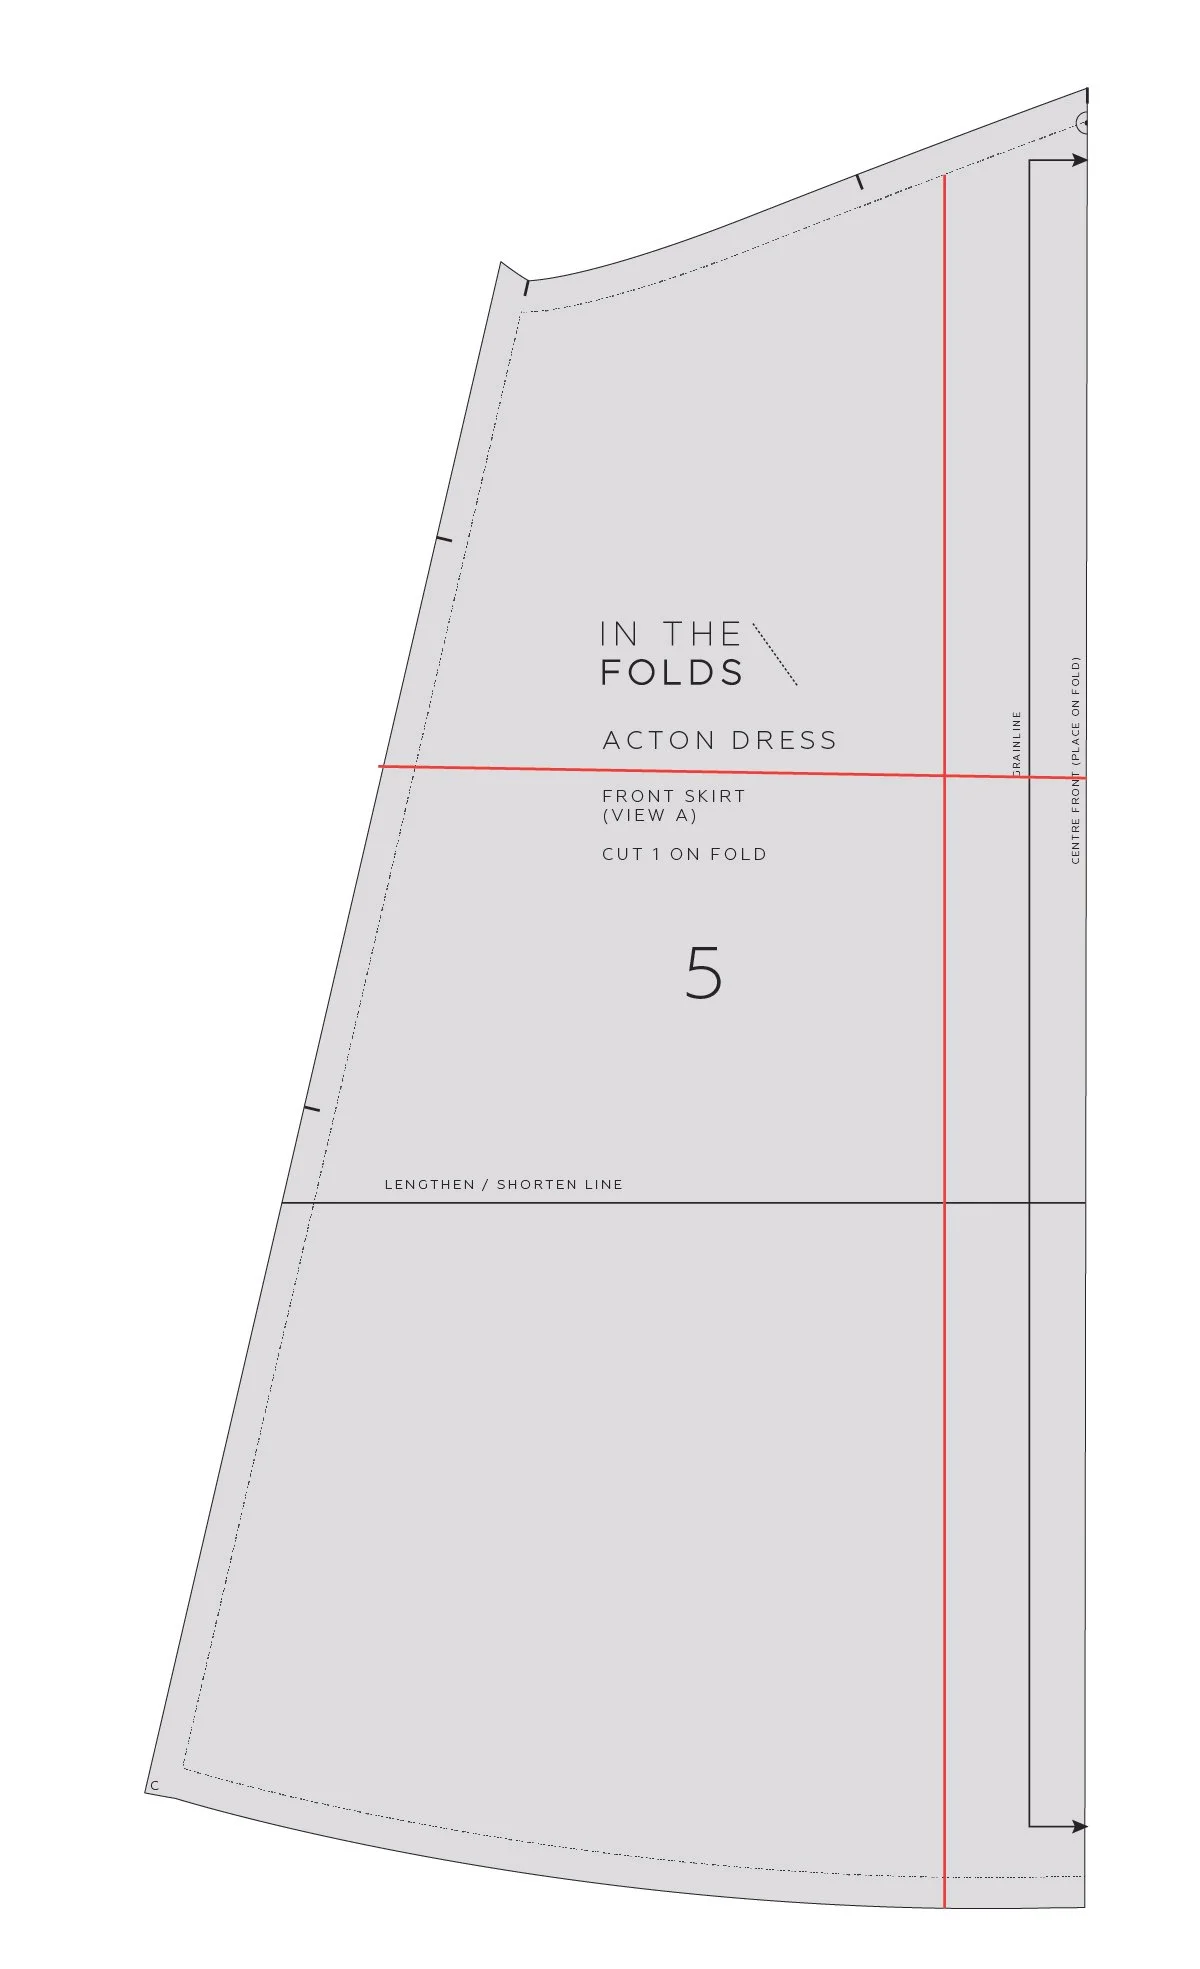
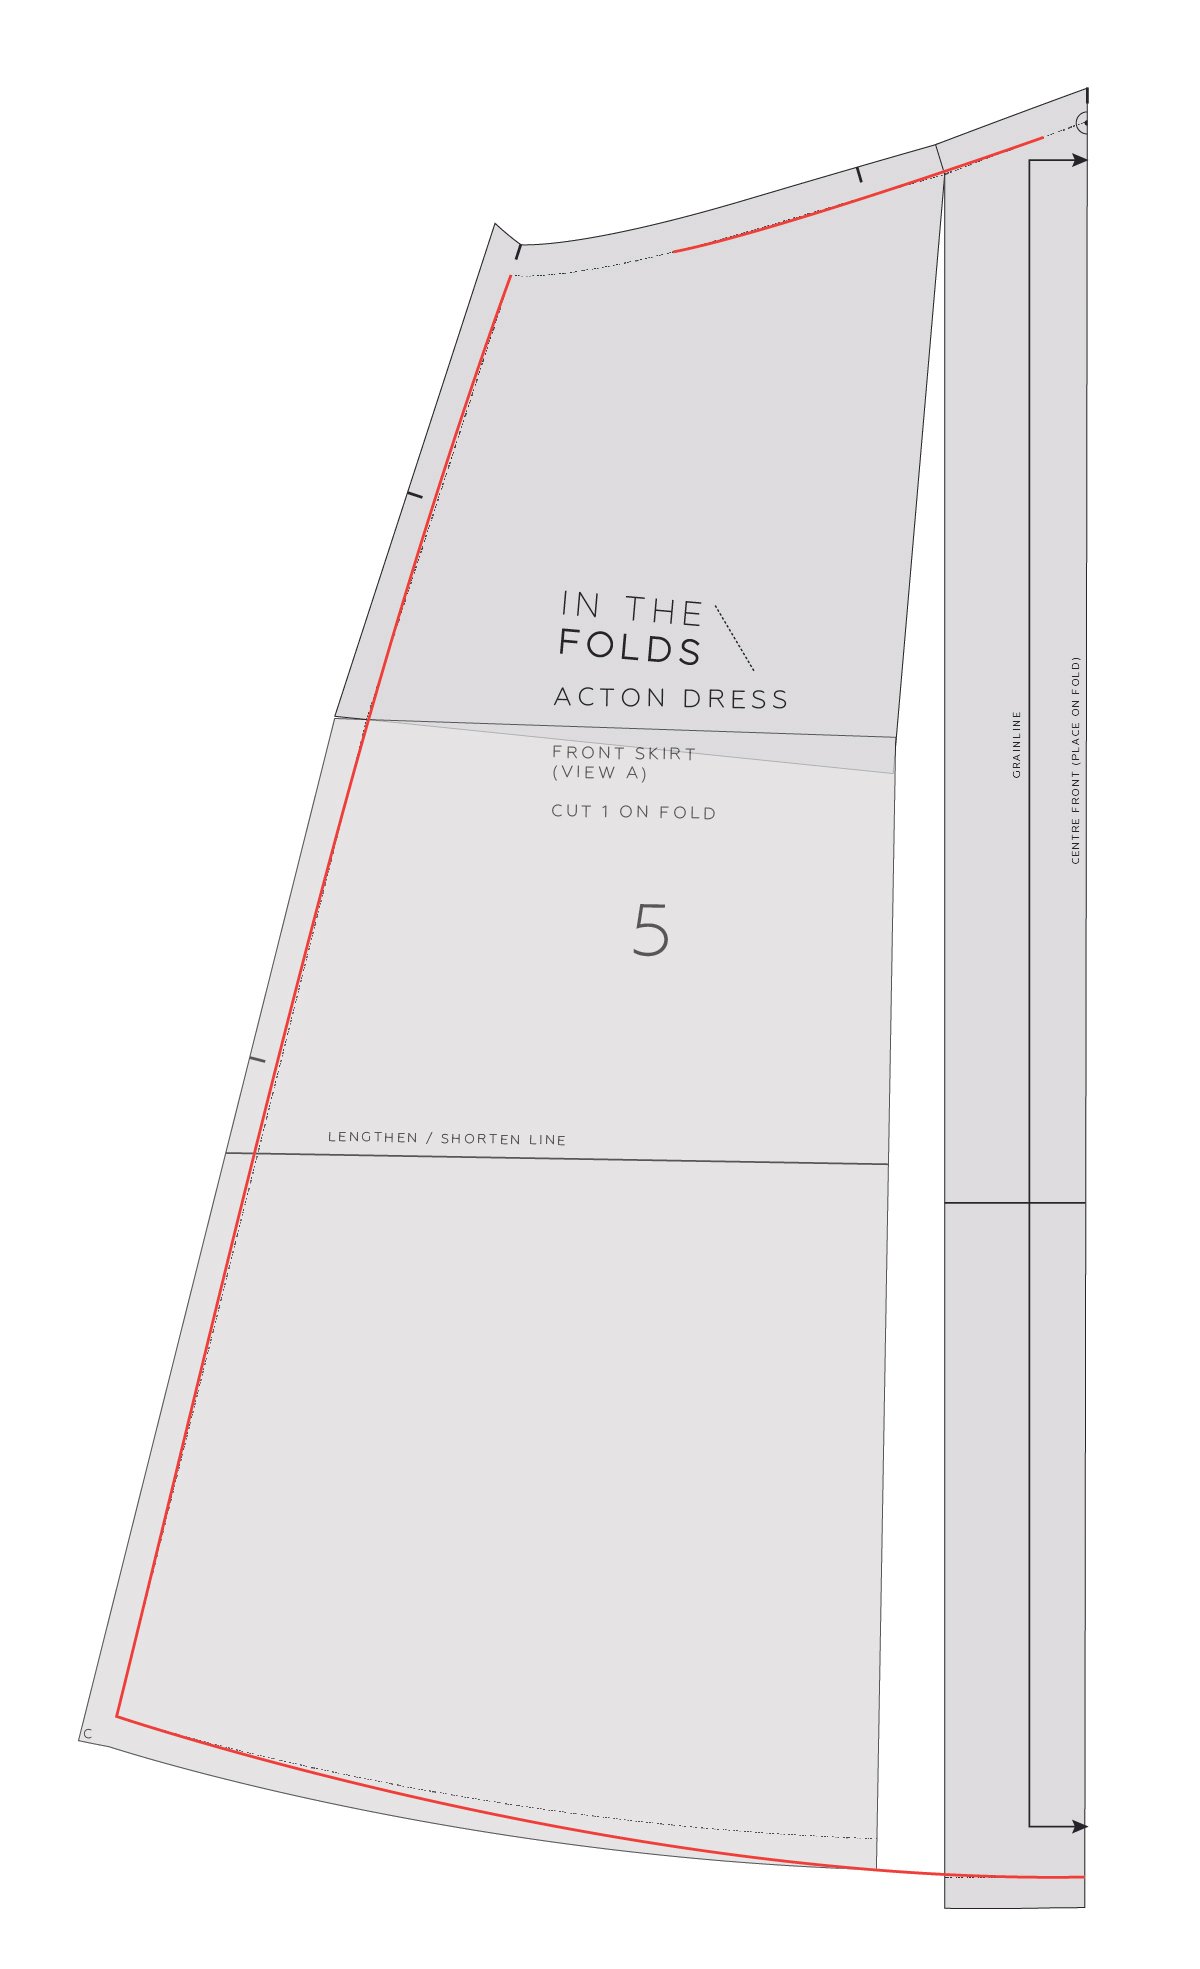
Trace a copy of the FRONT SKIRT [5] pattern piece.
Start by marking in some guidelines. It is a good idea to hold the pattern piece up to your body to work out where to place them for your specific body shape. If you have made a toile, you can use it as a reference.
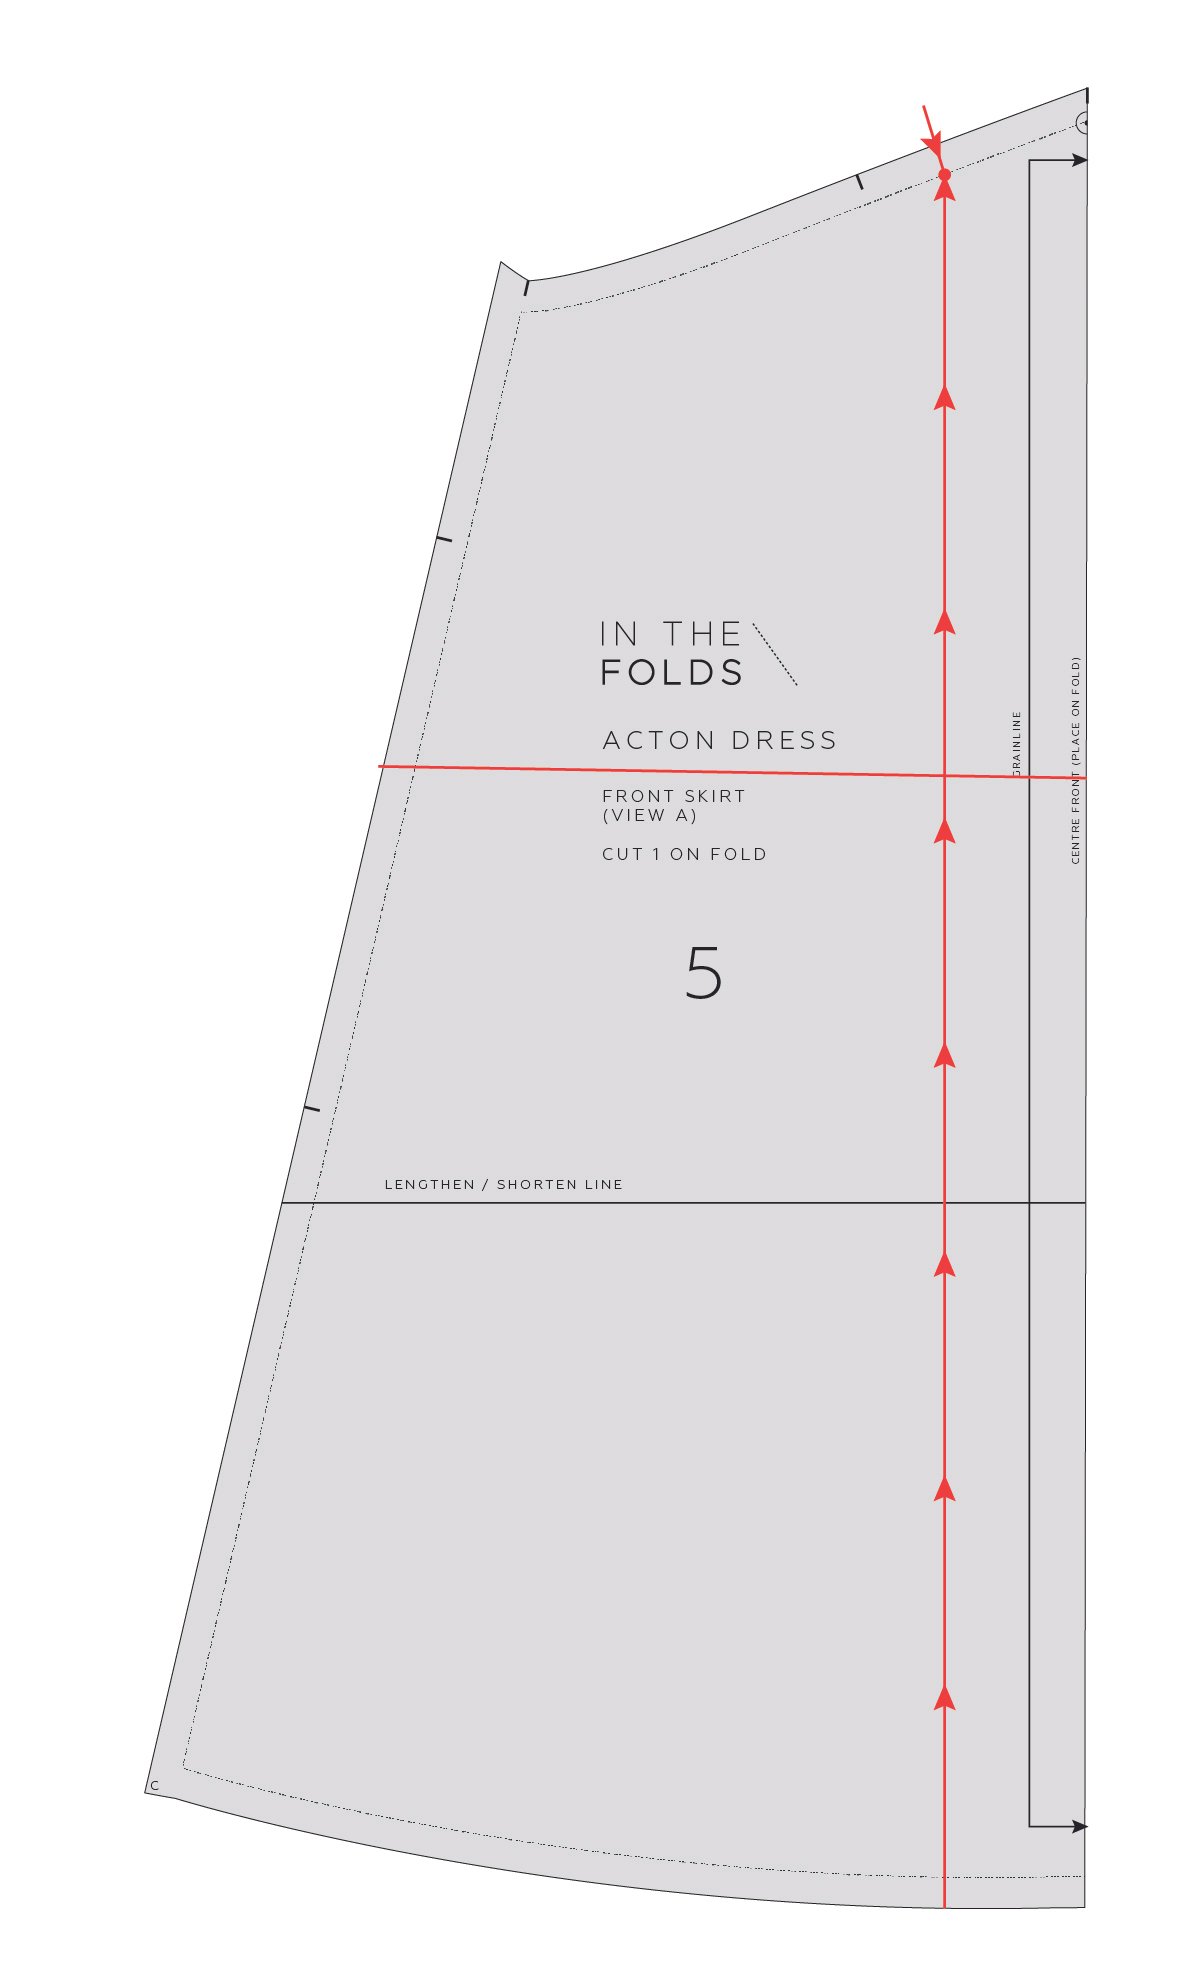
You need one vertical guideline in the area your stomach protrudes and one horizontal guideline at your tummy position (the peak of your tummy).
Step 2
Cut up the vertical guideline from the hem line. Stop when you get to the stitch line on the top edge. Cut into the seam allowance on the top edge towards the point where you stopped cutting. Leave a 1-2mm hinge of paper.

Step 3
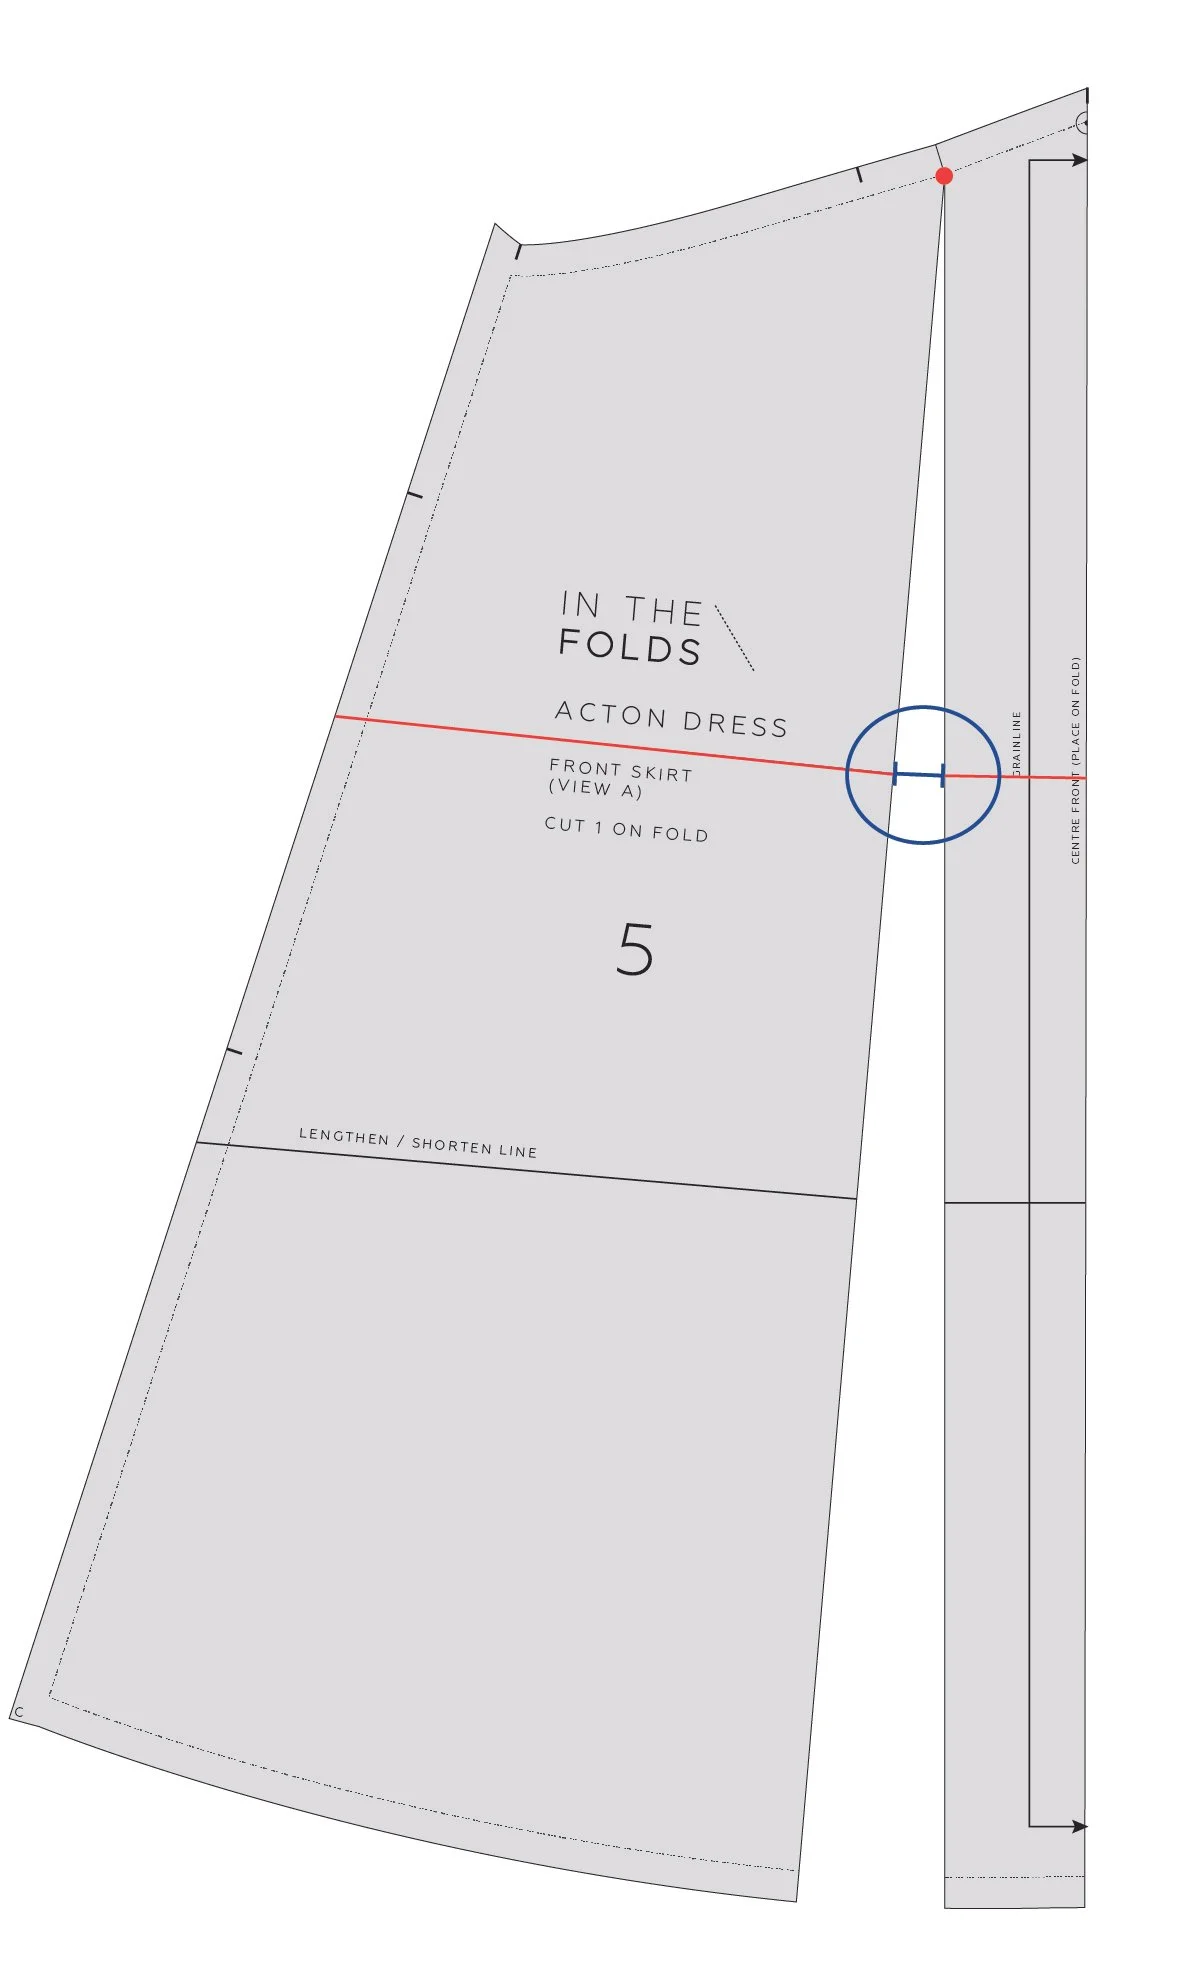
From the vertical cut line, cut into the horizontal guideline towards the side seam. Stop cutting when you hit the stitch line. Cut into the seam allowance from the other side, leaving a small 1-2mm hinge.
Step 4
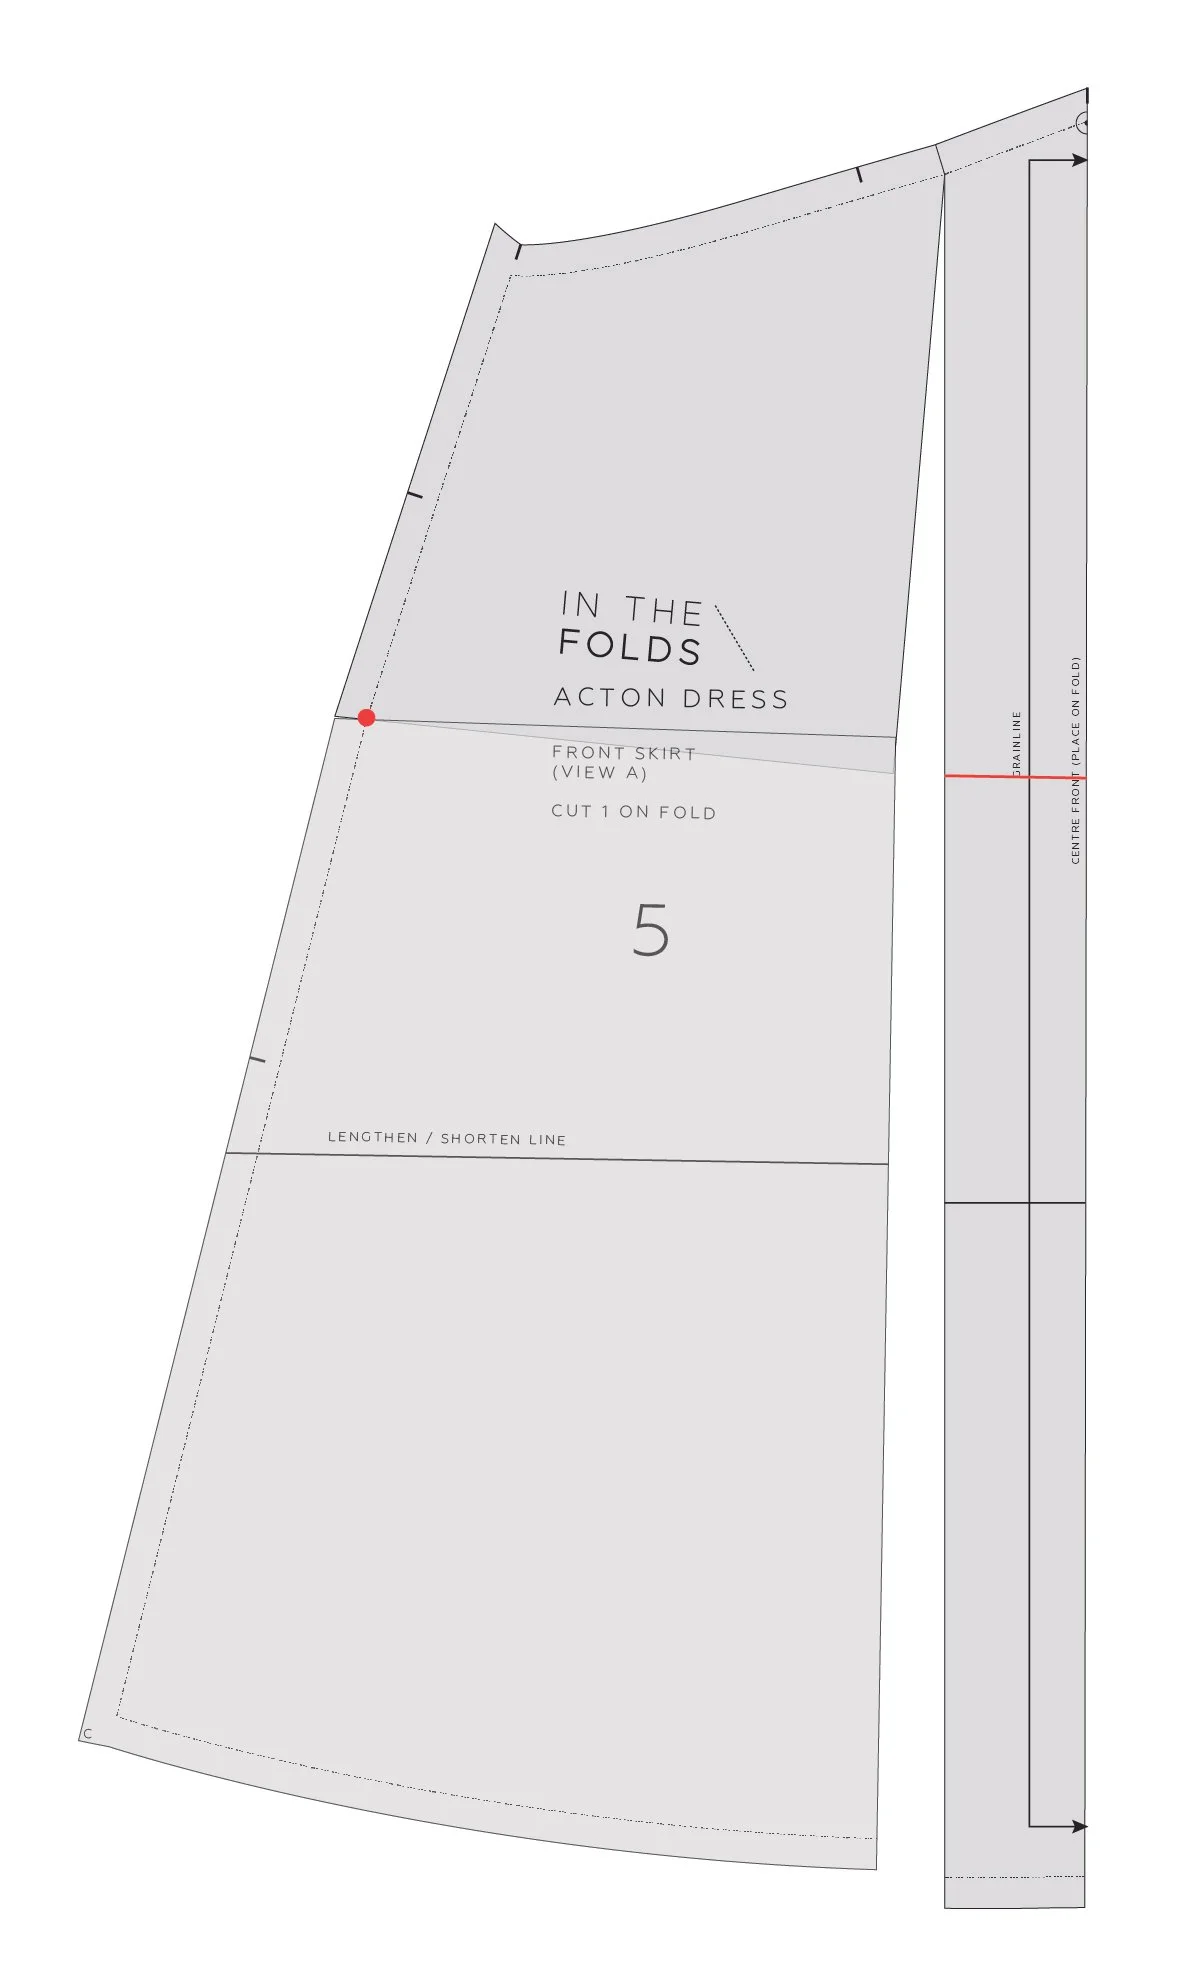
Slide some pattern paper under the piece so that you have something to stick the altered pattern to.
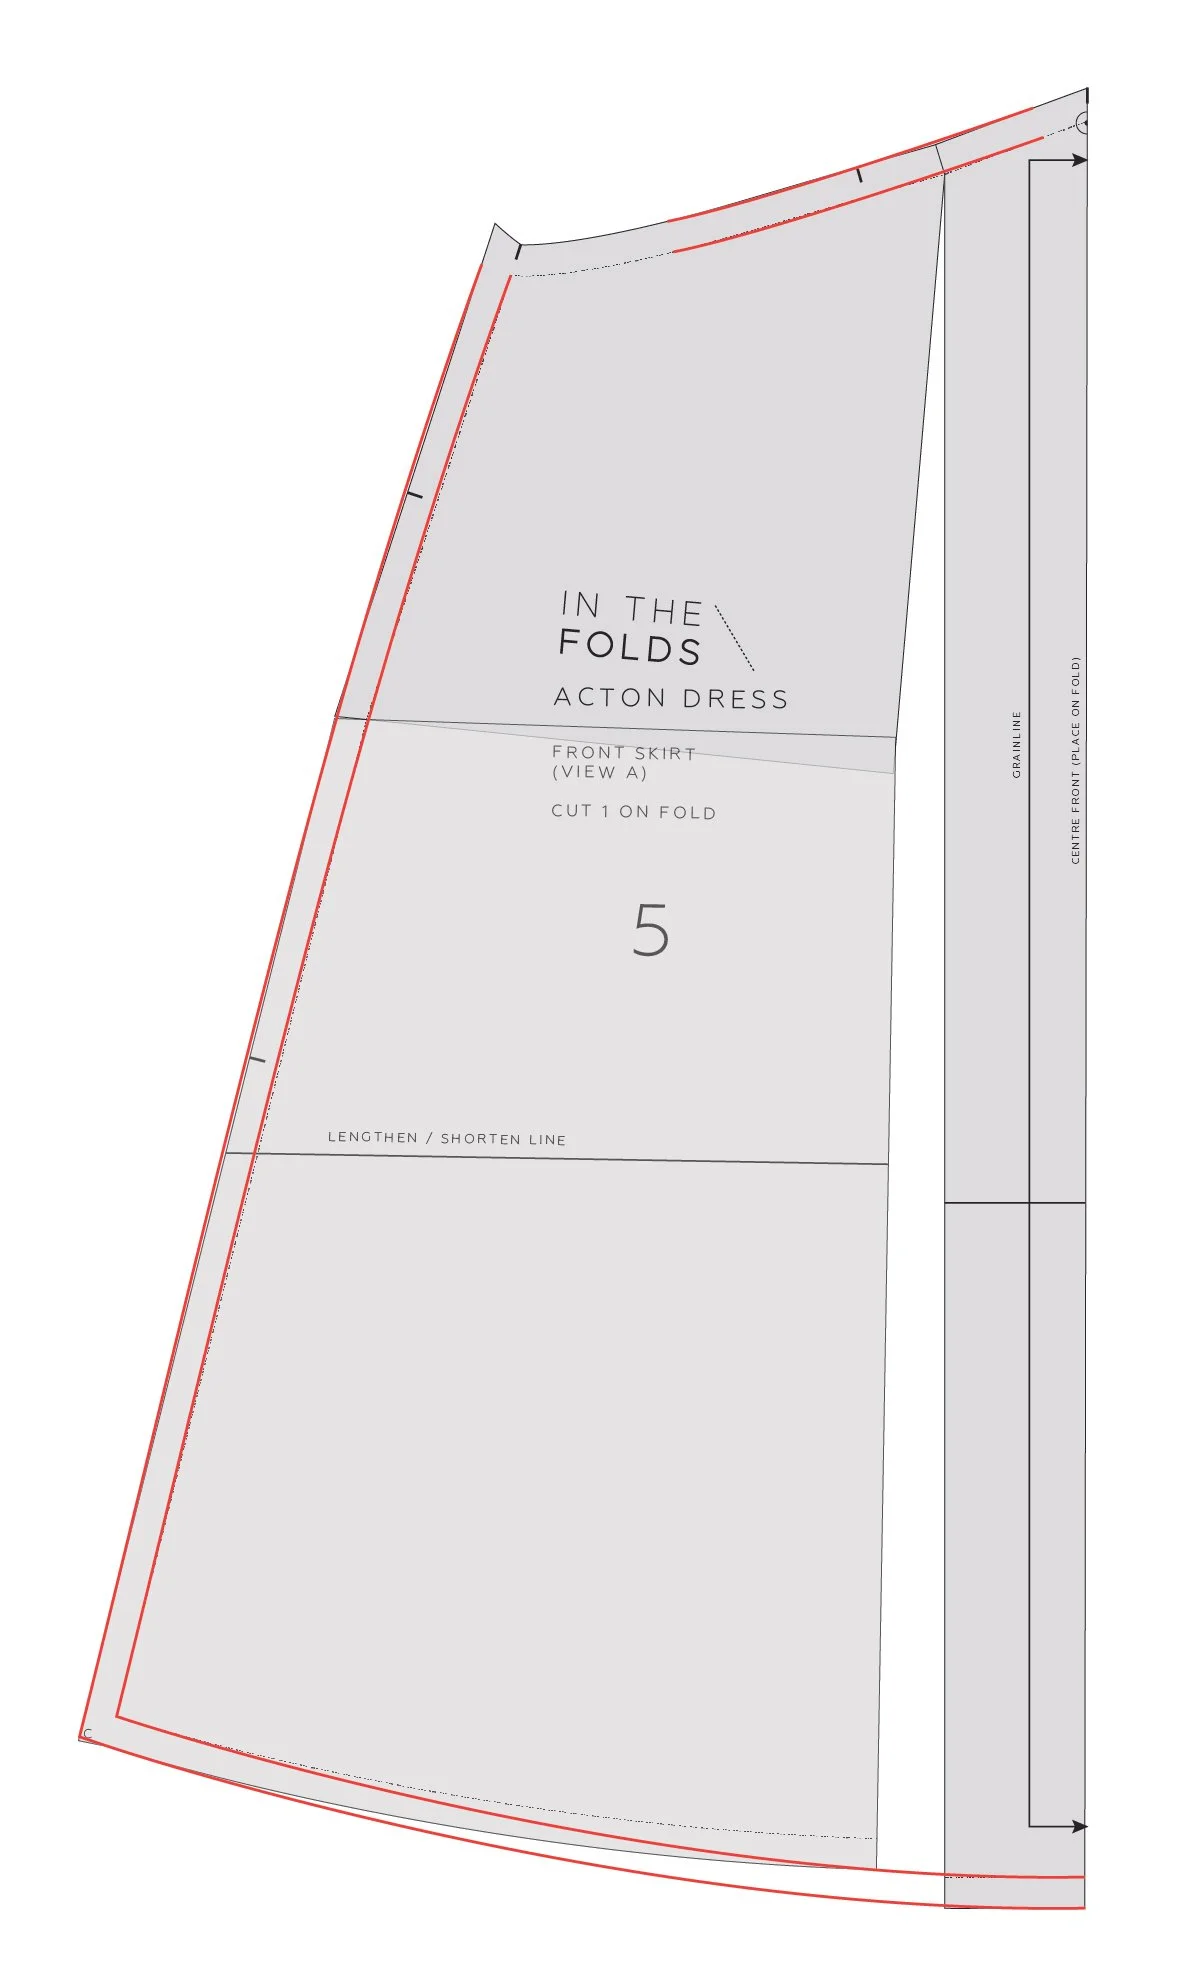
Swing open the vertical slash line. Measure the opening at the horizontal line and add the amount you need. Remember that this piece is cut on the fold. If you would like to add 4cm extra room at the tummy in total, you will add 2cm on each side.
Hold in place with a pattern weight (or can of food or whatever you've got around to hold it in place).
Step 5
Use the horizontal cut line to rotate the lower section of the side seam so that the width added to the piece is consistent down to the hem. Tape in place on the pattern paper underneath.
Step 6
Take a ruler and tidy up the lines over the altered areas. Start with the stitch lines. For the hem, join the side seam to the centre front with a nice gently curve. Be sure to meet the centre front at a right angle so that when this piece is cut on the fold there are no ridges or dips.
The side seam will become gently curved to smooth out the angle in the seam.
Smooth out the line on the top edge with a smooth curve.
Step 7
Add seam allowance back onto the altered lines and you're done!
Happy sewing,
Emily
RESOURCES MENTIONED IN THIS ISSUE
For more issues of the Q & A series, you can check out the archive here.

